Apple has released the iOS 18.4 Release Candidate for beta testers and developers, indicating that the final version of iOS 18.4 will be available soon. The iOS 18 updates have introduced a variety of new features, including new emojis, priority notifications, and enhanced CarPlay functionality. Additionally, this update continues to refine Apple Intelligence on supported devices.
Among the many new features in iOS 18.4, one of the most useful is the Scheduled Send Later feature for messages. This feature is currently limited to iMessage conversations only. If you’re unfamiliar with this feature, don’t worry! In this guide, I’ll provide a step-by-step tutorial on how to schedule text messages on an iPhone.
To schedule a message on your iPhone running iOS 18:
1. Open the Messages app: Launch the Messages app and select an existing iMessage conversation or start a new one.
2. Compose your message: Type your message in the text field, but do not send it yet.
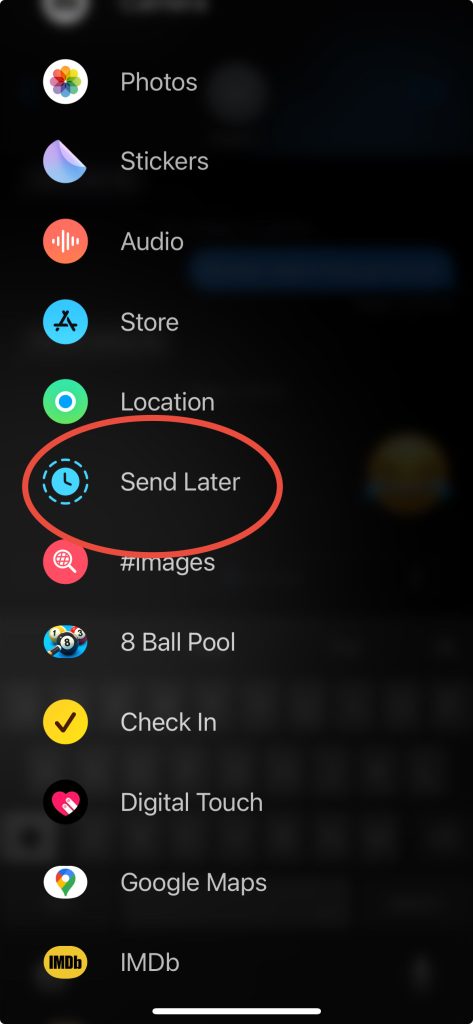
3. Access additional options: Tap the ’+’ icon to the left of the text field to reveal more options.
4. Select ‘Send Later’: In the menu that appears, tap on ‘Send Later’. If you don’t see it immediately, tap ‘More’ to find the option.
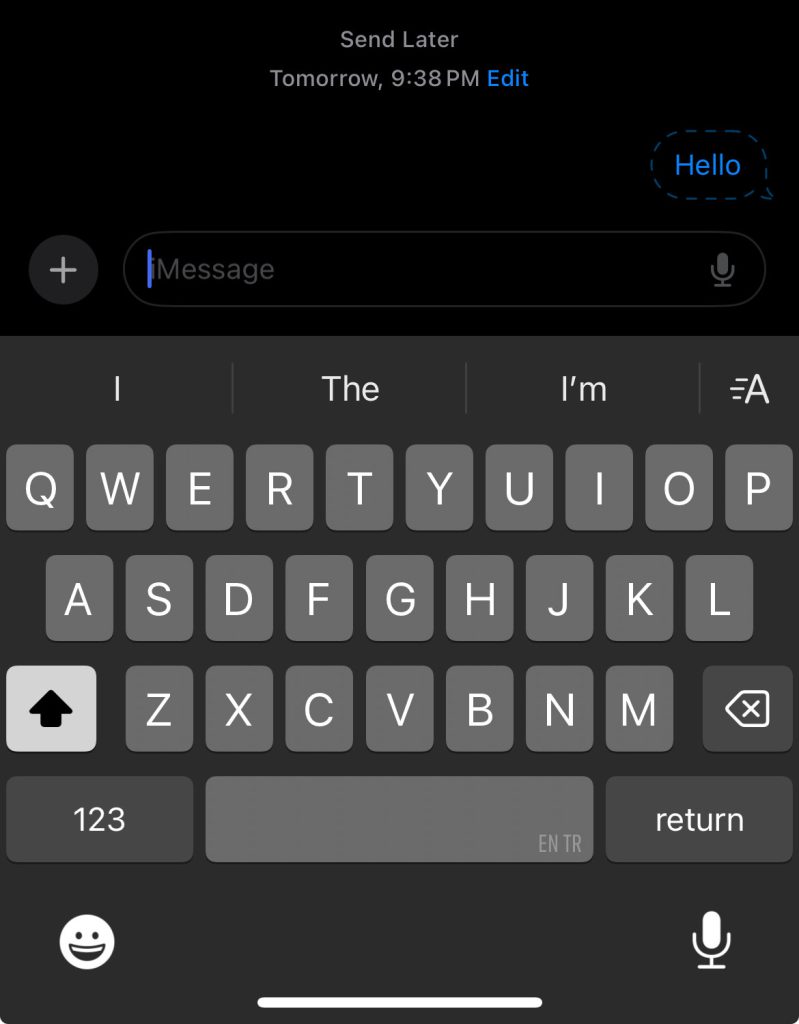
5. Set the delivery time: A date and time picker will appear. Set the time accordingly.
6. Schedule the message: After setting the time, tap the “Blue Arrow” to schedule the message. The scheduled message will appear in the conversation as shown below.