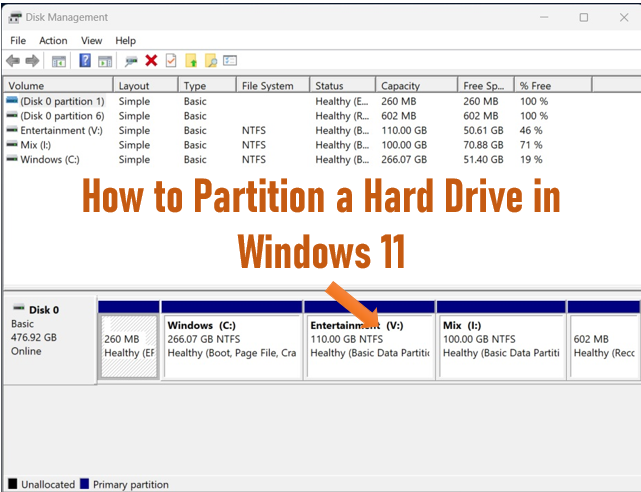
So, you’ve just installed a new hard drive in your system. The first step you should take is creating different partitions, making it easier to organize and locate your data. While partitioning a hard drive might seem complex, Windows offers a built-in tool that simplifies the process. Whether you want to create a dedicated drive for important files or better manage your system’s storage, partitioning can effectively meet your needs. Additionally, partitioning is useful if you plan to install multiple versions of Windows on your system.
Here’s how you can create a partition on Windows 11:
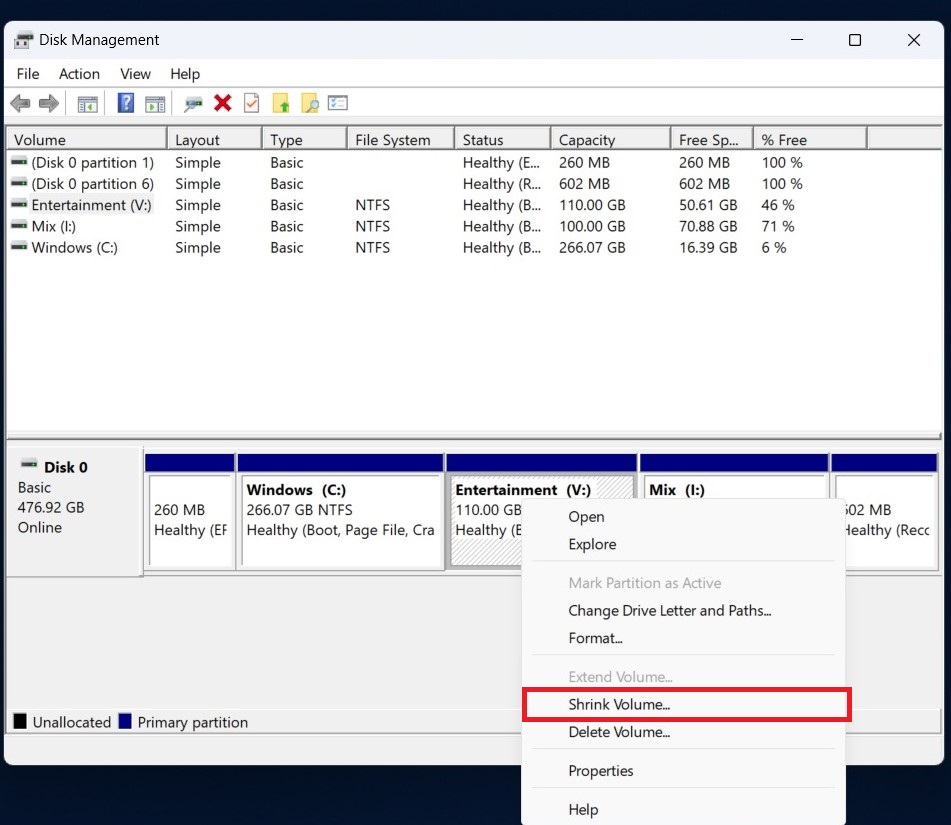
1. Open Disk Management:
Right-click the Start button and select Disk Management.

2. Select the Drive:
Right-click the drive you want to partition and choose Shrink Volume.
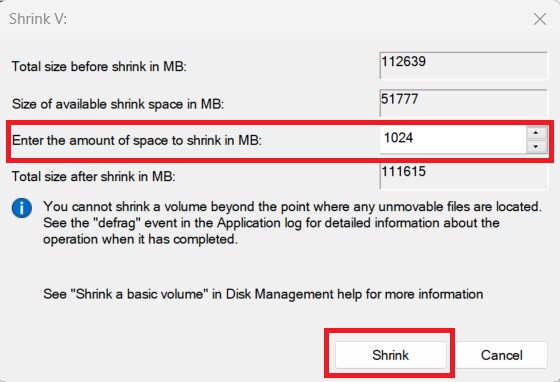
3. Enter Shrink Size:
Specify the amount of space to shrink and click Shrink.
4. Create New Partition:
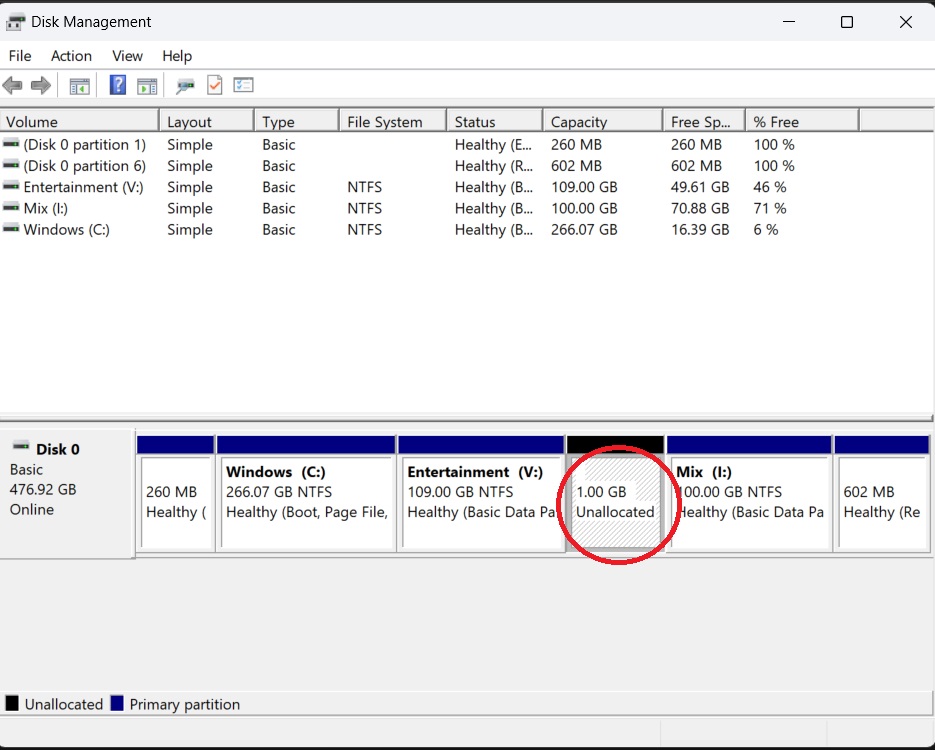
Right-click the Unallocated Space and select New Simple Volume.
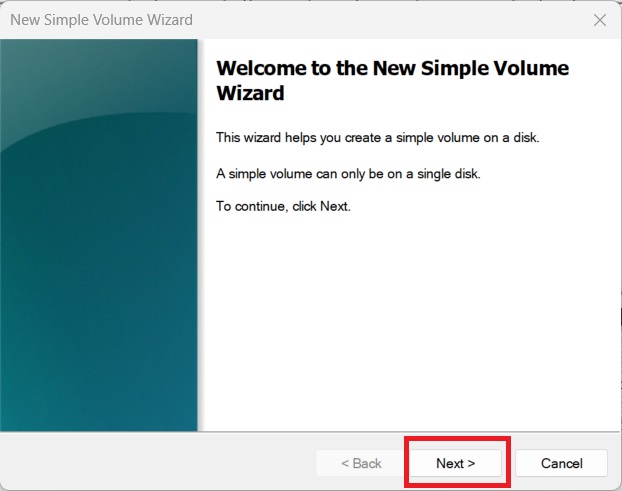
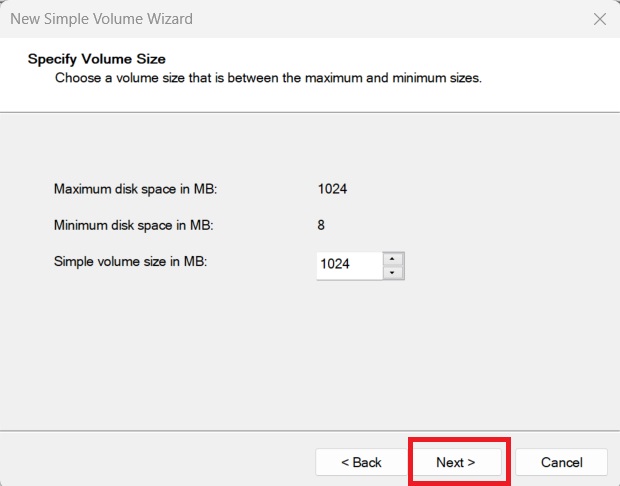
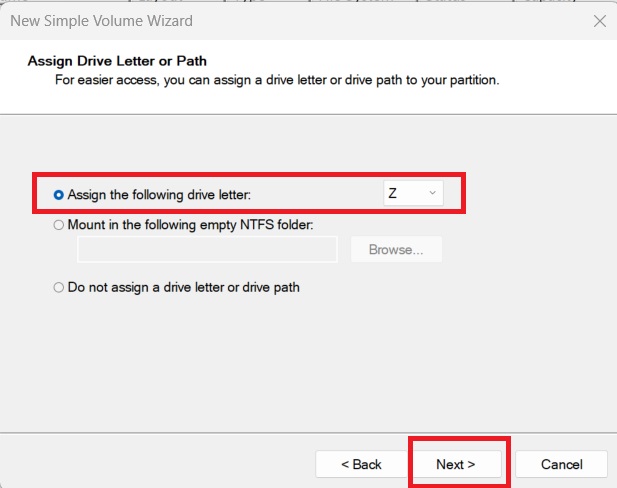
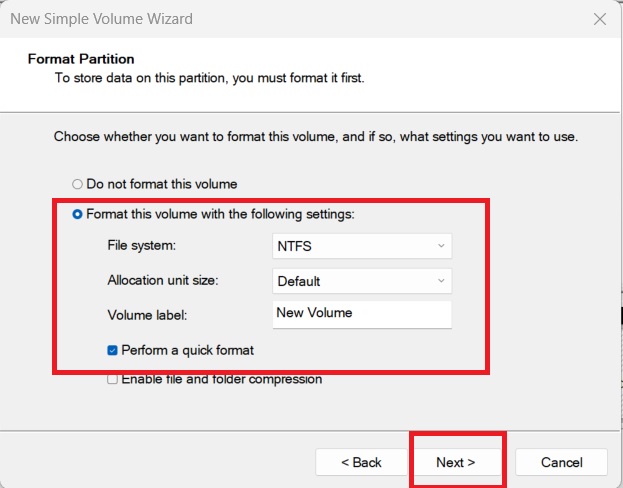
5. Follow the Wizard:
Click Next, assign a drive letter, format the volume (choose NTFS), and click Finish.
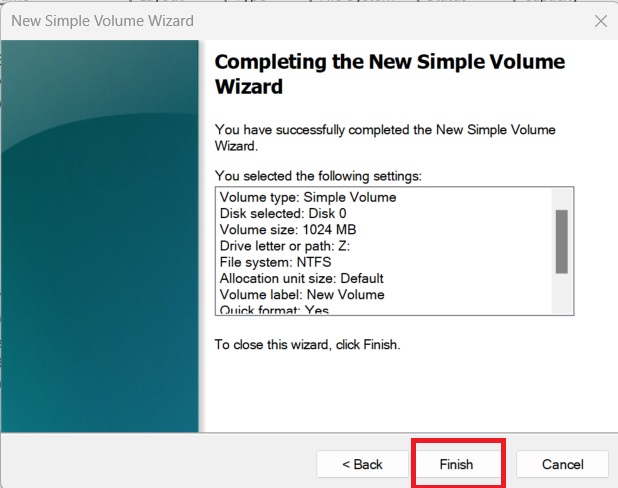

Your new partition is now ready!