FAT32, an older file system compared to NTFS or exFAT, remains popular due to its unique advantages. This guide will show you how to format a USB drive in FAT32 format to ensure streamlined compatibility and functionality.
Why Choose FAT32?
Despite being an older file system, FAT32 offers several benefits:
- Cross-Platform Compatibility: FAT32 works seamlessly across various operating systems (Windows, macOS, Linux) and devices (cameras, gaming consoles). This makes it ideal for removable drives needing access on multiple systems.
- Simplicity: FAT32 is less complex than NTFS, translating to lower overhead and potentially faster performance in certain scenarios.
However, remember that FAT32 has notable limitations:
• Maximum File Size: 4 GB
• Maximum Partition Size: 8 TB
Note-Keep these limitations in mind when deciding to format in FAT32.
Steps to Format a USB Drive in FAT32 on Windows:
1. Insert the USB Drive: Plug the USB drive into your computer.
2. Open File Explorer: Press Windows + E to open File Explorer.
3. Locate the USB Drive: Find the USB drive listed under “This PC”.
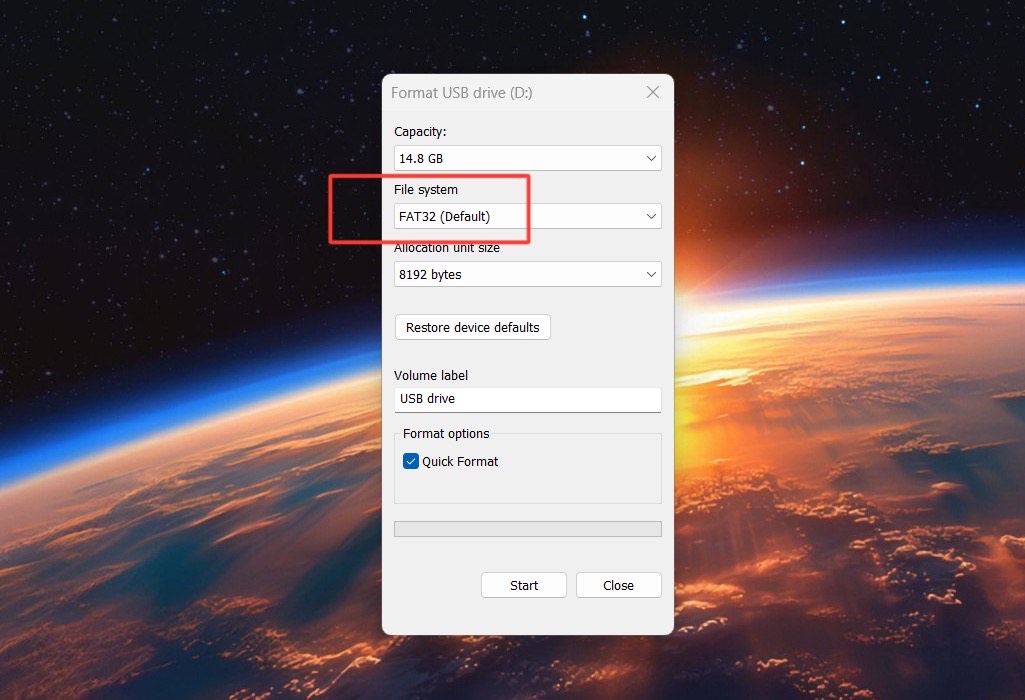
4. Format the Drive: Right-click the USB drive and select “Format” from the context menu.
5. Choose FAT32: In the Format dialog box, select “FAT32” from the “File system” dropdown menu.
6. Quick Format Option: Check the “Quick Format” box for a faster format and leave it unchecked for a full format (more thorough but slower).
7. Start Formatting: Click “Start” to begin the process and then confirm the warning that all data will be erased by clicking “OK”.
8. Wait for Completion: Allow the process to complete. Once finished, your USB drive will be formatted in FAT32.
By following these steps, you can easily format your USB drive in FAT32, ensuring compatibility and simplicity for your needs.