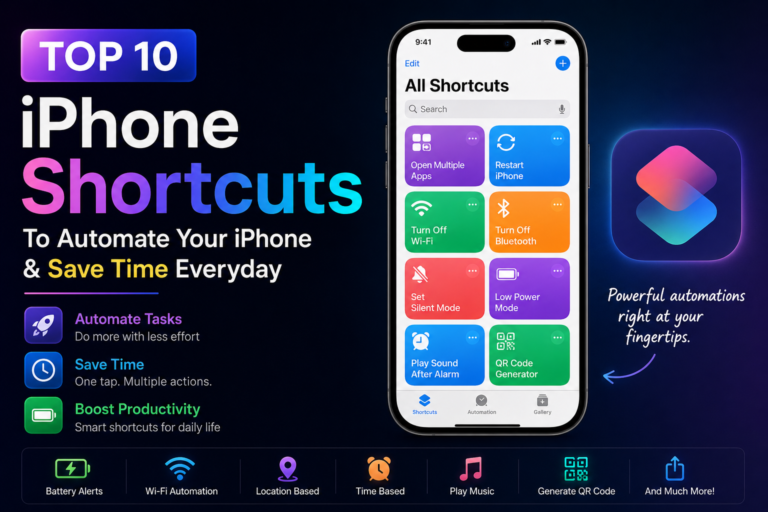
iPhone’s Guided Access mode is one of the hidden features that helps users in multiple ways. Whether you’re a parent who wants to control your child’s screen time or an individual seeking enhanced accessibility features, Guided Access mode has got you covered.
One of the many benefits of Guided Access mode is its ability to restrict certain features and content on your iPhone, providing a distraction-free environment. After enabling it, you can disable areas of the screen, certain buttons, or even specific apps.
Overall, Guided Access mode is a versatile and powerful tool that enhances your privacy, productivity, and accessibility on the iPhone.
Now, here are the steps to set up Guided Access mode:-
1. Open the Settings app and navigate to the Accessibility option.
2. Scroll down to the General section and choose Guided Access to turn it on.
3. Set up Face ID/Touch ID (depending on the model) and establish a passcode to deactivate Guided Access.
4. Launch any app you wish to restrict from other users, then triple-press the Home or Side button.
5. Tap “Options” located at the bottom left of the screen and select your desired settings.
6. Once you’ve finalized the parameters, tap “Start.”
7. To exit Guided Access mode, triple-press the Home or Side button again (depending on the model), input the passcode you previously set, and then select “End” in the top left corner. Alternatively, double-press to end immediately using Face ID if it’s configured.